Classic Kung Pao Chicken (Stainless Steel or Nonstick Pan)

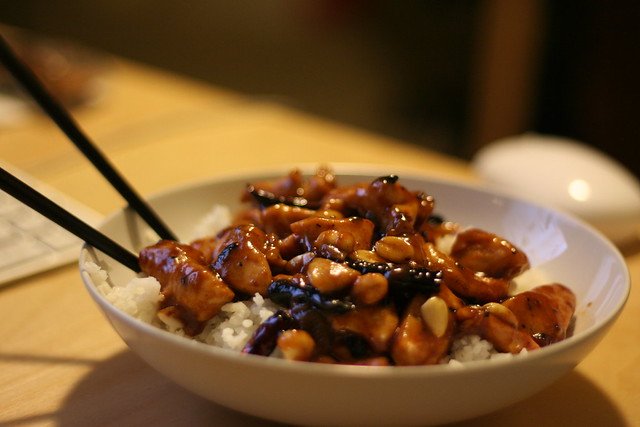
A quick, flavorful stir-fry featuring tender chicken, crunchy peanuts, and a sticky-sweet-spicy sauce—perfect for a weeknight dinner. This version is tuned for home cooks using a stainless steel or nonstick pan for reliable, restaurant-style results.

15 min Prep Time
12 min Cook Time
27 min Total Time
4 Servings
Medium Difficulty

Ingredients

Servings:
4
Nutrition (per serving)
Calories 520 kcal
Protein 32g
Fat 28g
Carbohydrates 34g
Fiber 4g
💾 Storage

Cool leftovers to room temperature (no more than 2 hours) and transfer to an airtight container. Refrigerate for up to 3 days. Reheat gently in a skillet over medium heat with a splash of water or stock to loosen the sauce, or microwave covered in short intervals until heated through. To freeze, place cooled Kung Pao Chicken in freezer-safe containers for up to 2 months; thaw overnight in the refrigerator before reheating. Note that peanuts may soften slightly after refrigeration or freezing.

🍳

Best Made With: Stainless Steel or Nonstick Pan

Choose a heavy-bottom stainless steel pan for best browning or a scratch-resistant nonstick skillet for easier release and cleanup.

See Our Top Stainless Steel or Nonstick Pan Picks →

Classic Kung Pao Chicken

Kung Pao Chicken is one of those dishes that proves you don’t need a wok to get spectacular results. With a balance of savory, sweet, sour, and spicy elements, plus contrasting textures from tender chicken and crunchy peanuts, it’s a complete meal that cooks up fast. The method here is built around techniques that work equally well in a heavy stainless steel skillet or a quality nonstick pan, so you can use what you already have in your kitchen.

What makes this recipe special is the layered flavor approach: a quick soy-garlic-ginger marinade to infuse the chicken, a cornstarch sealing step to keep the meat juicy, and a sauce that is reduced to a glossy coating at the finish. Dried chiles and a touch of Sichuan peppercorn (optional) provide the characteristic numbing heat, while roasted peanuts add that irresistible crunch. It’s fast, forgiving, and deeply satisfying.

Why this recipe works

This recipe focuses on three priorities: high heat, quick cooking, and well-balanced sauce. High heat creates Maillard browning on the chicken’s surface even in a pan, quick cooking ensures tenderness, and a cornstarch slurry in the sauce creates the glossy finish that clings to every piece. Using either a heavy stainless steel pan or a good nonstick skillet helps control the browning and release of fond (the flavorful browned bits) for deglazing, so you get the texture and flavor without needing a commercial wok.

Choosing the right equipment

Both stainless steel and nonstick pans can produce excellent Kung Pao Chicken. A heavy-bottom stainless steel skillet gives superior browning and fond for deglazing, while a high-quality nonstick pan reduces the need for oil and is easier to clean. If you prefer a metal-utensil-safe nonstick surface, consider pans tested for scratch resistance. For shopping ideas, check our Best Scratch-Resistant Pans guide or our Best Cookware Deals roundup to find value picks across categories.

If you want quick options to browse, here are a couple of tools that pair well with this recipe: a sturdy stainless steel skillet (Stainless Steel Skillet on Amazon) for excellent browning, or a metal-safe nonstick pan (Scratch-Resistant Nonstick Pan on Amazon) if you prefer easier release and cleanup. For your prep knife, a sharp chef’s knife speeds up cutting: Chef’s Knife on Amazon.

If you’re deciding between pan types, our Best Scratch-Resistant Pans: Metal-Utensil Safe Nonstick Cookware guide is a great place to start. For broader deals and value options, see our Best Cookware Deals: Top Value Picks Across Every Category guide.

Cooking overview

This recipe is laid out in three stages: marinating and coating the chicken, quick searing in a hot pan, and finishing with a glossy sauce and peanuts. Prep your mise en place—have the chilies, scallions, peanuts, and sauce components ready—because once the pan is hot, the dish comes together in minutes. A single pan and a bowl for the marinade are all you need for minimal cleanup.

Tips and variations

  • Control the heat: adjust the number of dried chiles and the amount of chili paste or fresh chiles to suit your spice tolerance. Toast a few Sichuan peppercorns and grind them for authentic numbing aroma, but use sparingly.
  • Get crunch: use roasted unsalted peanuts and fold them in at the end to retain texture. If you like more vegetables, red bell pepper and zucchini are good additions—toss them in after the chicken has browned so they cook quickly without getting soggy.
  • Make it gluten-free: substitute tamari or coconut aminos for soy sauce and check that any chili pastes are gluten-free.
  • Vegetarian option: swap chicken for extra-firm tofu, pressed and cubed. Pan-fry until golden and follow the same sauce and finishing steps for a satisfying meatless version.

With proper prep and a hot pan, this Kung Pao Chicken delivers complex flavors and contrasting textures that feel restaurant-quality but are simple enough for a weeknight. Scroll down to the ingredients and step-by-step instructions to start cooking.

Note: Ingredients, detailed instructions, nutrition facts, and storage tips are provided in the recipe metadata below so you can easily copy or print them for your kitchen.

Instructions

1

Marinate the chicken

In a bowl, combine the cubed chicken with 2 tsp soy sauce, 1 tsp Shaoxing wine (if using), 1 tsp sesame oil, and 1 tbsp cornstarch. Toss to coat and let sit for 10–15 minutes while you prep other ingredients. The cornstarch helps seal in juices and promotes a silky exterior when seared.

💡 Pro tip: If short on time, marinate while you preheat the pan; even 10 minutes adds flavor.
2

Mix the sauce

In a small bowl, whisk together 1/4 cup soy sauce, 2 tbsp black or rice vinegar, 1 tbsp hoisin sauce, 1 tbsp brown sugar, and 1/4 cup stock. In a separate tiny bowl, dissolve 2 tsp cornstarch in 1–2 tbsp water and set aside. The cornstarch slurry will thicken the sauce quickly at the end.

3

Heat the pan and sear the chicken

Heat a heavy stainless steel or nonstick pan over medium-high heat until hot. Add 2 tbsp vegetable oil and swirl to coat. Add the marinated chicken in a single layer, leaving space between pieces, and sear without moving for 1–2 minutes to develop color. Stir and cook until mostly cooked through (about 3–4 minutes total). Transfer chicken to a plate and set aside.

💡 Pro tip: Work in batches if your pan is crowded; overcrowding causes steaming instead of searing.
4

Aromatics and chiles

Return the pan to medium heat and add the remaining 1 tbsp oil. Add dried red chiles and toasted Sichuan peppercorns (if using) and fry briefly until fragrant, about 30 seconds. Add minced garlic, ginger, and the white parts of the scallions; stir-fry for another 20–30 seconds. Be careful not to burn the garlic.

💡 Pro tip: Reduce heat slightly if the aromatics begin to brown too quickly.
5

Add vegetables and return chicken

If using bell pepper, add it now and stir-fry for 1 minute so it retains some crunch. Return the chicken and any accumulated juices to the pan, tossing to combine with the aromatics.

6

Finish with sauce and peanuts

Give the prepared sauce another quick stir and pour it into the pan. Stir to combine, then add the cornstarch slurry and stir constantly as the sauce heats and thickens to a glossy coating that clings to the chicken (about 1 minute). Fold in the roasted peanuts and the green parts of the scallions, then remove from heat.

💡 Pro tip: If the sauce becomes too thick, add a tablespoon or two of stock to loosen it.
7

Adjust seasoning and serve

Taste and adjust seasoning with salt or a splash more soy if needed. Serve immediately over steamed rice or noodles, garnished with extra scallions or a sprinkle of toasted sesame seeds if desired.

More to Cook

You Might Also Like

Classic Dutch Oven Beef Stew

A hearty, slow-simmered beef stew made in a Dutch oven—perfectly browned beef, tender root vegetables, and a rich, savory gravy. This classic one-pot meal is ideal for family dinners and makes delicious leftovers.

View Recipe →

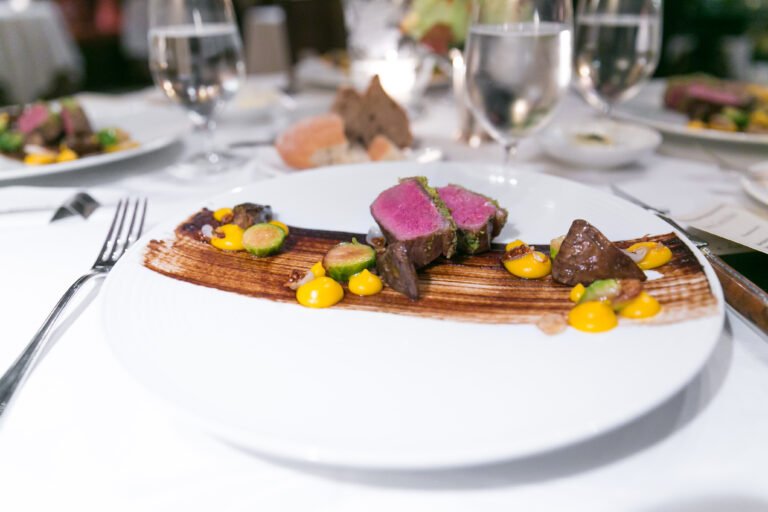
Herb-Crusted Rack of Lamb

A classic herb-crusted rack of lamb that's tender, flavorful, and elegant enough for weeknight celebrations or dinner parties; this step-by-step recipe shows how to get a crisp herb crust and a perfect medium-rare roast every time. Includes equipment recommendations and practical tips to make carving and serving easy.

View Recipe →

Homemade Cold Brew Coffee Concentrate

Make smooth, low-acid cold brew concentrate at home with a simple steep-and-strain method that yields café-quality iced coffee and lattes. This versatile concentrate stores well, dilutes easily, and is perfect for busy mornings or entertaining.

View Recipe →

Stay in the loop

Get the Best Kitchen Picks Delivered

New buying guides, honest reviews, and kitchen-tested recipes — straight to your inbox. No spam, ever.