Pour-Over Coffee Step by Step
Pour-over coffee is a simple, elegant brewing method that emphasizes clarity, aroma and control. Unlike automatic drip brewers, pour-over gives you hands-on control over variables like water temperature, pour rate and extraction time — so you can coax nuanced flavors from your beans. This recipe walks you through each step, explains why it works and helps you produce a clean, balanced cup every time.
What makes pour-over special is the combination of immersion and flow: a short bloom allows trapped gases to escape and the grounds to hydrate evenly, then a steady, controlled pour extracts soluble flavors without over-extracting bitter compounds. Pour-over can highlight floral, fruity and bright notes that can be muted in other brewing methods, and it scales easily from a single cup to multiple servings.
Why this method works
Pour-over brewing uses a paper or cloth filter that removes oils and fine sediment, giving a crisp cup with clean body. The technique’s focus on grind size, water temperature and pour pattern means you can tune extraction to the bean. Lighter roasts benefit from higher temperatures and slightly finer grinds to emphasize acidity and complexity; darker roasts are more forgiving and suit coarser grinds and slightly cooler water for sweetness and balance.
If you already own a home espresso machine or drip brewer, learning pour-over deepens your understanding of extraction and helps you dial in recipes that translate across devices. For readers shopping for equipment, check our guides to home espresso and drip brewers to compare models and find tools that match your routine: our Best Espresso Machines for Home Baristas guide and Best Drip Coffee Makers guide are useful starting points.
Choosing the right equipment
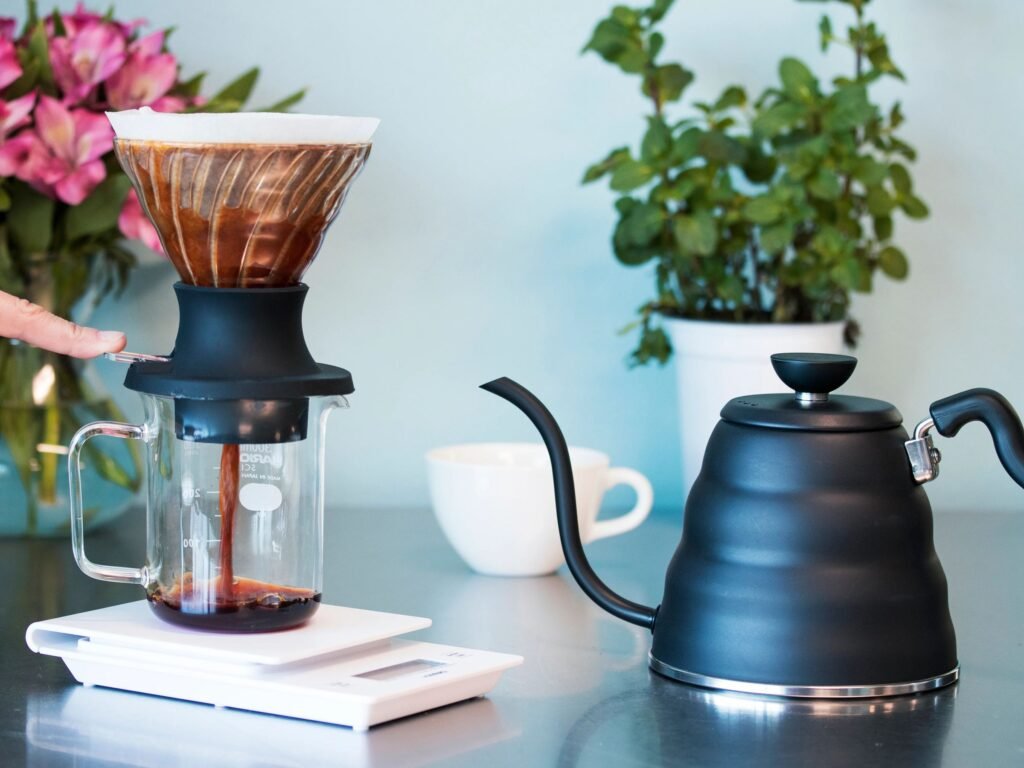
You don’t need an expensive setup to make excellent pour-over coffee, but a few dedicated tools make the process repeatable and precise:
- A pour-over dripper (cone-shaped like a Hario V60 or flat-bottom style) — paper filters are the most common and produce a clean cup.
- A gooseneck kettle for precise, steady pouring.
- A burr grinder for consistent particle size; blade grinders are inconsistent and make it harder to extract evenly.
- A kitchen scale and timer to control brew ratio and total brew time.
- Fresh, high-quality whole-bean coffee and good filtered water.
If you’re shopping, here are a few items to consider (affiliate links):
- Hario V60-style dripper — a classic cone dripper that rewards consistent pouring technique.
- Baratza Encore burr grinder — a reliable entry-level burr grinder that delivers uniform grounds.
- Gooseneck kettle — the steady spout gives the control you need for an even pour.
For a deeper dive into coffee gear and which appliances fit different routines, see our Best Espresso Machines for Home Baristas guide for hybrid setups, or the Best Drip Coffee Makers guide if you prefer automatic brewers that still deliver great flavor.
The principles to focus on
To brew consistently, pay attention to four variables:
- Grind size — medium-coarse to medium (similar to sea salt) is a good starting point for most drippers.
- Brew ratio — the standard is 1:16 (coffee to water) but you can adjust 1:15–1:17 to taste.
- Water temperature — 195–205°F (90–96°C) is ideal; slightly cooler for light roasts, slightly hotter for darker roasts.
- Pour technique and timing — an initial bloom followed by controlled concentric pours produces an even extraction and predictable brew time (2.5–4 minutes depending on recipe).
What to expect
A well-executed pour-over usually takes 3–4 minutes from first pour to final drip. The cup should be clean, with pronounced aroma and a bright but balanced acidity. If the coffee tastes sour, it may be under-extracted (try finer grind or longer contact time). If it tastes bitter or hollow, it may be over-extracted (try coarser grind or shorter brew).
Tips and variations
1. Freshness matters — use beans roasted within the past 2–3 weeks for optimal flavor; store beans in an airtight container away from light and heat.
2. Rinse paper filters before brewing to remove any papery taste and preheat the dripper and server; discard the rinse water before adding grounds.
3. Use a scale and timer for repeatability — once you have a recipe you like, you can repeat it exactly every time by measuring dose and water by weight.
4. Experiment with bloom time and pulse pouring — a 30–45 second bloom is common, and gentle pulse pours (adding water in stages) help maintain an even extraction when brewing larger volumes.
Final thoughts
Pour-over coffee is both rewarding and forgiving once you understand the basics. It’s an excellent method for tasting a coffee’s character and improving your brewing skills. With a few affordable tools and a little practice, you can make a café-quality cup at home.
If you want to expand into espresso-based drinks, consult our Best Espresso Machines for Home Baristas guide to find machines that match your skill level and budget. Likewise, if you alternate between pour-over and automatic brewing, the Best Drip Coffee Makers guide can help you choose a machine for larger batches.