Cast Iron Skillet Mac and Cheese

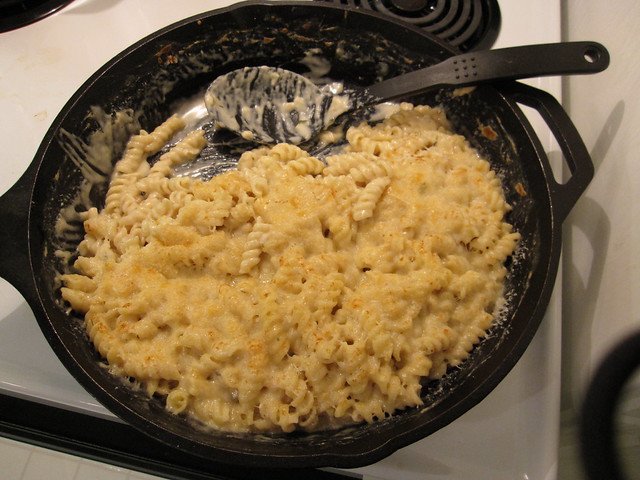
Creamy, cheesy baked mac and cheese finished under a golden breadcrumb crust — made and served straight from a cast iron skillet for perfect texture and rustic charm. This one-pan recipe blends sharp cheddar and Gruyère with a buttery béchamel for rich flavor and easy cleanup.

15 min Prep Time
40 min Cook Time
55 min Total Time
6 Servings
Medium Difficulty

Ingredients

Servings:
6
Nutrition (per serving)
Calories 620 kcal
Protein 24g
Fat 34g
Carbohydrates 49g
Fiber 2g
💾 Storage

Cool to room temperature, cover the skillet tightly with foil or transfer leftovers to an airtight container. Refrigerate up to 3–4 days. Reheat in a 350°F oven until warmed through (about 15–20 minutes) or microwave individual portions, stirring halfway. To refresh the breadcrumb topping, sprinkle a few drops of olive oil on top and bake for 5–7 minutes to re-crisp.

🍳

Best Made With: Cast Iron Skillet

Choose a 10–12 inch pre-seasoned cast iron skillet for even heating and easy handling; enameled cast iron is a good low-maintenance alternative.

See Our Top Cast Iron Skillet Picks →

Cast Iron Skillet Mac and Cheese

There’s something undeniably satisfying about mac and cheese that’s been baked until bubbling and golden, then carried from oven to table in a hot cast iron skillet. Using cast iron gives you an even, sustained heat that helps the sauce thicken and the breadcrumbs toast up crisp without the edges scorching. The result: a creamy interior with a crunchy, flavorful top — comfort food at its finest.

This recipe balances sharp cheddar for classic comfort with a bit of Gruyère (or fontina) to add nuttiness and meltability. A simple béchamel-style cheese sauce builds body and keeps the pasta luxuriously smooth, while a touch of Dijon and mustard powder brightens the richness. The technique is straightforward, and the skillet presentation makes it perfect for weeknight dinners or serving a crowd at casual gatherings.

Why a Cast Iron Skillet Works

Cast iron holds and distributes heat exceptionally well, which helps the sauce bubble evenly and the crust brown uniformly. Unlike thinner pans, a skillet’s mass resists temperature swings when you open the oven, so the mac keeps cooking steadily. The skillet also doubles as a serving piece for a cozy, rustic presentation — just bring it to the table and let everyone dig in.

If you don’t already own a good cast iron, this is the kind of recipe that makes the purchase worthwhile. For a modern alternative, you can also compare premium hybrid cookware in our guide on HexClad vs All-Clad. If you’re concerned about coatings or chemical treatments, see our roundup of Best Non-Toxic Cookware: PFAS-Free Pans for a Healthier Kitchen for ideas.

Choosing the Right Equipment

For this recipe, a 10- to 12-inch cast iron skillet is ideal — large enough to hold about a pound of pasta and the sauce with room to spare for bubbling and browning. Pre-seasoned, enameled, or bare cast iron all work; bare cast iron offers superior browning and the classic rustic look, while enameled versions are easier to maintain and won’t react with acidic ingredients.

If you need a reliable, affordable option, consider the Lodge 10.25-Inch Cast Iron Skillet (https://www.amazon.com/s?k=Lodge+Cast+Iron+Skillet&tag=lesson0f-20). For tools used while stirring and scraping, a heat-resistant silicone spatula is indispensable — this simple tool makes scraping the roux and sauce from the skillet easy (https://www.amazon.com/s?k=silicone+spatula&tag=lesson0f-20).

What Makes This Version Special

  • Double-cheese approach: sharp cheddar for flavor, Gruyère for smooth melt and nuance.
  • Béchamel base: a roux and milk create a silky, stable sauce that resists separating — ideal for baking.
  • Skillet baking: the heavy pan encourages even heating and a crisp top while keeping the inside creamy.

Serving Suggestions

Serve the mac and cheese straight from the skillet with a simple green salad and pickles to cut through the richness. For protein, top with sliced grilled chicken or crisped bacon. Leftovers reheat well — see the storage section below for details.

Tips and Variations

  • Use a mix of cheeses for the best texture: one with strong flavor (cheddar) and one that melts smoothly (Gruyère, fontina, or Monterey Jack).
  • For a crunchy topping, mix Panko breadcrumbs with a little melted butter and sprinkle evenly before baking; for extra flavor, add grated Parmesan to the breadcrumb mix.
  • Stir in a small spoonful of Dijon mustard or a pinch of mustard powder to brighten the sauce and balance the richness.
  • Make it smoky or meaty by folding in crumbled cooked bacon, diced ham, or a spoonful of smoked paprika for a different flavor profile.

Final Notes

This cast iron skillet mac and cheese is approachable but yields a result that feels a step above the standard stovetop version. It’s ideal for family dinners, potlucks, or when you want something reliably comforting with a crunchy top. Keep your skillet well-seasoned, and it will serve you for many mac-and-cheese nights to come.

If you’re shopping for cookware or upgrading your kitchen, check our guides on premium cookware comparisons and safer, PFAS-free options linked earlier to make a confident choice.
Instructions

1

Preheat and cook pasta

Preheat oven to 400°F (200°C). Bring a large pot of salted water to a boil and cook the pasta 1–2 minutes shy of package directions (about 7–8 minutes), so it’s al dente. Drain and set aside.

💡 Pro tip: Slightly undercooking the pasta prevents it from becoming mushy during baking.
2

Make the béchamel base

In a 10–12-inch cast iron skillet (or saucepan if preferred), melt 3 tablespoons butter over medium heat. Whisk in the flour and cook for 1–2 minutes to form a roux, stirring constantly so it doesn’t brown. Slowly whisk in the milk and cream until smooth. Cook, stirring, until the mixture thickens and coats the back of a spoon, about 5–7 minutes.

💡 Pro tip: Hold the heat moderate — too high and the milk can scorch; whisk continuously for a silky sauce.
3

Add cheeses and seasonings

Reduce heat to low and whisk in the cream cheese until fully incorporated. Stir in the shredded cheddar and Gruyère a handful at a time until melted and smooth. Mix in Dijon, mustard powder, salt, pepper, and smoked paprika if using. Taste and adjust seasoning.

💡 Pro tip: Shred cheeses yourself for better melting; pre-shredded cheese often contains anti-caking agents that affect texture.
4

Combine pasta and sauce

Fold the drained pasta into the cheese sauce in the skillet until evenly coated. If the sauce seems too thick, add a splash of milk to loosen. Smooth the top with a spatula so the surface is even for topping.

💡 Pro tip: Reserve a little pasta cooking water to adjust sauce consistency if needed.
5

Prepare breadcrumb topping

In a small bowl, mix the Panko breadcrumbs with melted butter (and a tablespoon of grated Parmesan if you like). Sprinkle the breadcrumb mixture evenly over the macaroni and drizzle a little olive oil over the top for extra crisping.

💡 Pro tip: Panko gives the crispiest texture; regular breadcrumbs will be denser.
6

Bake until bubbly

Place the skillet in the preheated oven and bake 15–20 minutes, until the topping is golden and the sauce is bubbling around the edges. For a deeper brown crust, broil on high for 1–2 minutes but watch closely to avoid burning.

💡 Pro tip: If using an enameled skillet, avoid extreme broiling; use the bake setting for browning instead.
7

Rest and serve

Remove skillet from oven and let rest 5 minutes to set slightly. Garnish with chopped parsley or chives if desired, then serve directly from the skillet.

💡 Pro tip: Resting helps the sauce thicken so portions hold together when served.

More to Cook

You Might Also Like

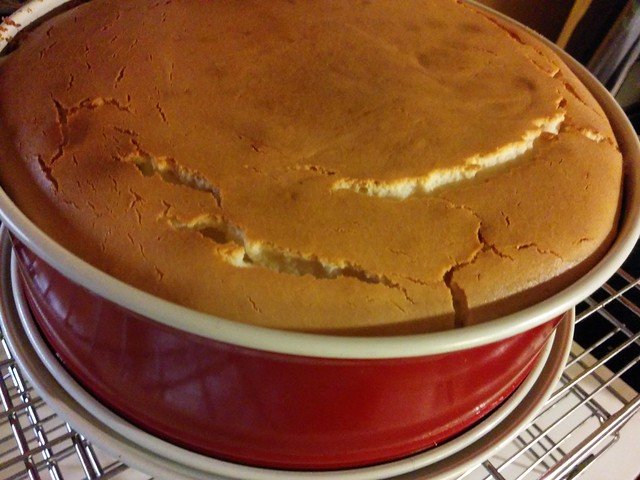
Classic New York Cheesecake

A rich, dense classic New York cheesecake with a buttery graham crust — reliably smooth, not-too-sweet, and perfect for holidays or everyday indulgence. Follow these equipment and technique tips for crack-free baking and the best texture.

View Recipe →

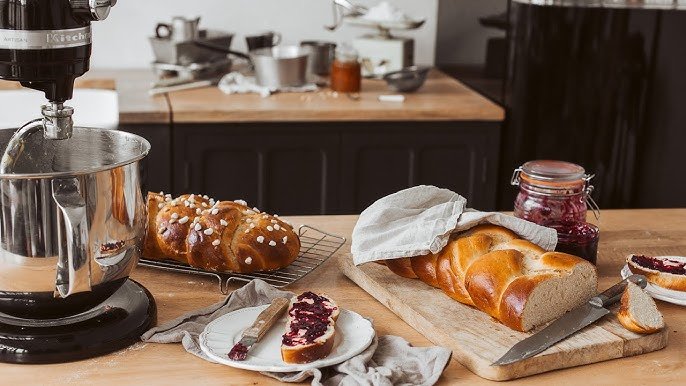
Stand Mixer Brioche Bread

Learn how to make rich, buttery brioche using a stand mixer and your oven — a foolproof method for soft, tender loaves that slice beautifully. This recipe fits both weekday breakfasts and weekend baking projects with clear steps, tips, and variations.

View Recipe →

Stay in the loop

Get the Best Kitchen Picks Delivered

New buying guides, honest reviews, and kitchen-tested recipes — straight to your inbox. No spam, ever.