Cast Iron Seared Ribeye Steak
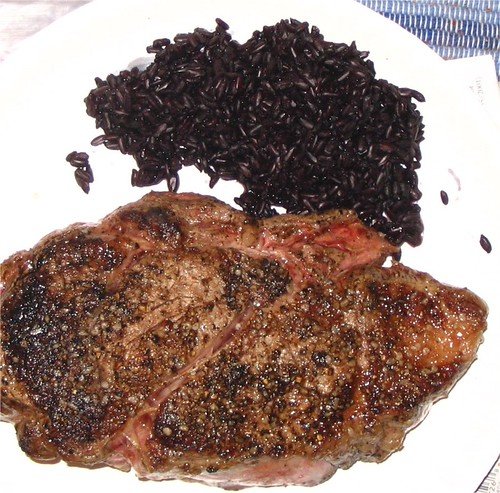
There are few things as satisfying as a perfectly seared ribeye straight off a hot cast iron skillet. This recipe uses high heat to develop a deep Maillard crust while finishing with butter, garlic, and herbs to add glossy flavor and aromatics. The technique is simple, repeatable, and ideal for home cooks who want steakhouse results without a grill.
What makes this method special is the combination of a very hot, heavy skillet and short, intense cooking followed by a brief rest. Cast iron’s ability to hold and evenly distribute heat is crucial — it gives you the searing power of a professional cooktop and the stability to baste the steak in butter without losing temperature. With a few pantry staples and a reliable skillet, you’ll get consistent color, flavor, and doneness every time.
Why a Cast Iron Skillet Works
Cast iron retains heat far better than thin pans, which means the moment your steak hits the surface it starts forming that coveted crust. The weight and thickness of cast iron also keep heat steady when you add cold or room-temperature food, preventing the pan from cooling too quickly. That steady, high heat is what creates a deeply caramelized surface without overcooking the interior.
If you’re shopping for a skillet, a 10- to 12-inch pre-seasoned model covers most home cooking needs and gives you space to baste comfortably. If you prefer an enameled option for easier maintenance or want to explore nonstick choices for other tasks, check our buying guides for deals and eco-friendly options: Best Cookware Deals: Top Value Picks Across Every Category and Best Eco-Friendly Cookware: PFAS-Free and Sustainable Options.
Choosing the Right Equipment
For this recipe you only need a few reliable tools: a heavy cast iron skillet, a good pair of tongs, an instant-read thermometer, and a sturdy chef’s knife to rest and slice the steak. If you don’t already own a skillet, the classic Lodge cast iron skillet is a popular, budget-friendly choice that performs well and lasts a lifetime — you can find options on Amazon here.
An accurate instant-read thermometer is one of the simplest upgrades to guarantee perfect doneness — we like models that give a fast, clear read. Search for instant-read thermometers on Amazon here. A sharp chef’s knife for trimming and slicing will improve your plating and make carving safe and easy; look for a high-quality chef’s knife if you plan to cook often.
Technique Overview
Key steps in this method are: dry the steak well, season generously, preheat the skillet until it’s smoking hot, sear each side without moving the steak to maximize contact and crust, then reduce heat slightly and baste with butter and aromatics to finish. Finally, rest the steak to allow the juices to redistribute before slicing.
Because timing depends on steak thickness and starting temperature, use an instant-read thermometer to take the guesswork out of doneness — pull the steak a few degrees below your target temperature and let carryover cooking raise it to perfect while it rests.
Finishing and Serving
After searing and basting, let the ribeye rest uncovered on a cutting board for 5–10 minutes. This short rest lets the muscle fibers relax and the juices redistribute, which keeps the meat moist when you slice. Slice against the grain for the most tender bite. Serve with simple sides like roasted potatoes, steamed greens, or a crisp salad to let the steak shine.
Tips and Variations
1. Salt early for deeper seasoning: If you have time, salt your ribeye at least 40 minutes before cooking (or up to overnight in the fridge) to let the salt penetrate and improve texture. Pat dry before searing to ensure a good crust.
2. Use butter basting for flavor: Add a knob of butter, smashed garlic, and a sprig of thyme or rosemary to the pan during the last minute of cooking, tilt the skillet away from you and spoon the melted butter over the steak repeatedly to add flavor and shine.
3. Don’t overcrowd the pan: Cook one or two steaks at most in a 10–12 inch skillet; too many will drop the pan temperature and produce less browning.
4. Experiment with compound butters or finishing salts: Try a garlic-herb butter or a sprinkle of flaky sea salt just before serving for a restaurant-style finish.
Safety and Doneness Guide
Use these target internal temperatures as a guide (remove steak 3°F/2°C before the target to allow for carryover): Rare 120–125°F (remove at 117–122°F), Medium-Rare 130–135°F (remove at 127–132°F), Medium 140–145°F, Medium-Well 150–155°F. Always use an instant-read thermometer inserted into the thickest part of the steak for the best results.
With practice you’ll be able to predict doneness by touch and timing, but the thermometer is the foolproof way to nail it every time.
Buying Guide Links and Recommended Gear
For more cookware ideas and deals, see our Best Cookware Deals buying guide: Top Value Picks Across Every Category. If you’re looking for scratch-resistant pans for other cooking tasks, check our guide on Best Scratch-Resistant Pans.
Ready-made product searches on Amazon (affiliate):
- Lodge Cast Iron Skillet — reliable, pre-seasoned, and made in the USA.
- Instant-Read Meat Thermometer — fast, accurate reads to hit perfect doneness every time.
These affiliate links help support HomeCookPicks when you shop; thanks for checking them out if you find them useful.
Whether you’re cooking a special dinner or just treating yourself, a cast iron seared ribeye is a straightforward way to get bold flavor and an impressive presentation with minimal fuss. Follow the technique, keep your pan hot, and don’t rush the rest — the result is a juicy, beautifully crusted steak that’s worth every minute.