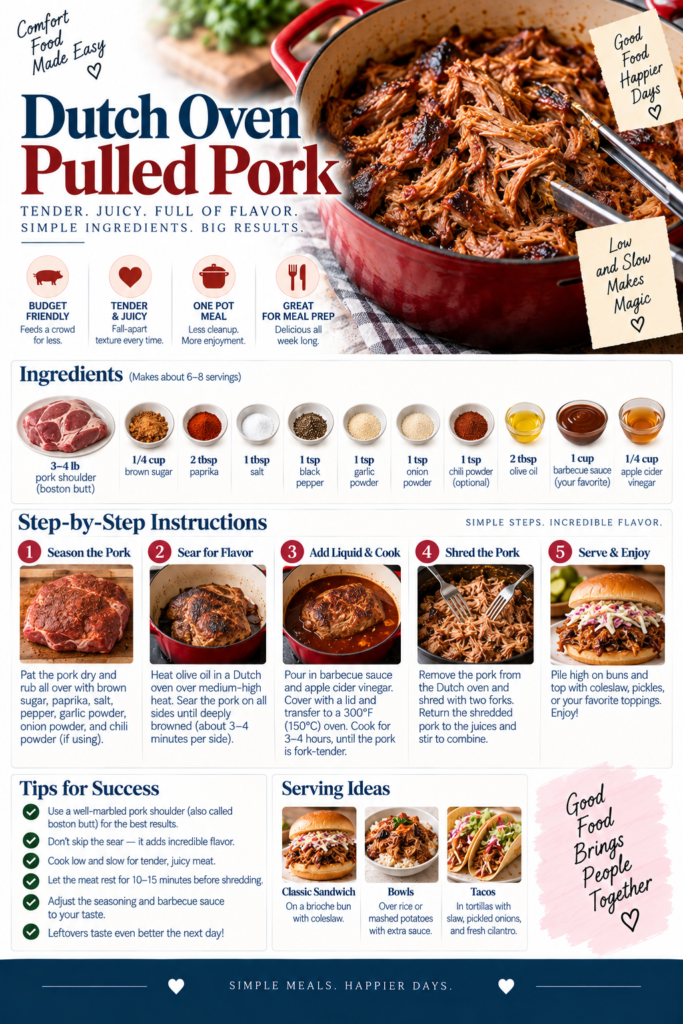
Dutch Oven Pulled Pork
This Dutch oven pulled pork recipe delivers deeply flavored, fall-apart meat with a simple, reliable technique you can make in any home oven. The combination of a robust dry rub, an initial sear, and slow braising in a covered pot yields a tender interior and caramelized edges — the kind of texture and flavor you usually only get from a smoker.
What makes this approach special is the Dutch oven itself: its heavy lid traps steam, creating a moist cooking environment while the cast-iron base promotes even browning. Cooking low and slow breaks down connective tissue in the shoulder (Boston butt), transforming a budget cut into something rich and silky. Plus, you don’t need a backyard smoker or specialized equipment to get barbecue-worthy results.
Why a Dutch Oven Works for Pulled Pork
A Dutch oven is uniquely suited to braising tough cuts because it combines two essential functions: even, retained heat for steady cooking, and a tight-fitting lid that captures and returns moisture. During long braises the meat slowly gelatinizes as collagen converts to gelatin, producing that luscious, unctuous mouthfeel. A short, hot sear before braising generates the Maillard reaction, adding the caramelized crust and layered savory notes you expect from great barbecue.
For best results, use an enameled or well-seasoned cast-iron Dutch oven with good heat retention. If you’re shopping for cookware, our guide to Best Non-Toxic Cookware covers safer finishes and materials; and if you’re deciding between premium stainless options for other tasks in your kitchen, this HexClad vs All-Clad guide can help you weigh features and performance.
Choosing the Right Equipment
Key pieces that make this recipe effortless:
- 2.5–6 quart Dutch oven (heavy cast iron or enameled). A reliable choice is the Lodge Enameled Dutch Oven — if you need one quickly, you can browse current options here: Lodge Enameled Dutch Oven on Amazon.
- Instant-read thermometer — essential to know when pork reaches pullable perfection: Instant Read Meat Thermometer on Amazon.
- A sharp chef’s knife and sturdy tongs for shredding and handling the meat.
If you’re investing in new cookware, prioritize a heavy, well-fitting lid and thick walls for steady heat; enameled Dutch ovens are low-maintenance and easy to clean. For other pans in your collection, consult our buying guides linked above to choose materials that suit your cooking style and kitchen health priorities.
How This Recipe Comes Together
The process is straightforward: apply a brown-sugar-forward dry rub, sear the roast to develop color, add aromatics and braising liquid, then let the oven do the rest. The initial sear gives you flavor and texture; the slow braise renders fat and softens connective tissue. After several hours the meat should be easy to shred; if you like a saucier result, reduce the braising liquid on the stovetop and toss the shredded pork to coat.
Serving suggestions: pile the pork on toasted buns with slaw for classic sandwiches, stuff into corn tortillas with pickled onions and cilantro for tacos, or serve atop mashed potatoes or creamy polenta for a comforting dinner. Leftover pork makes excellent fried rice, nachos, or a quick chili base.
Tips & Variations
1. Use a meat thermometer — aim for 195–205°F for really tender, shreddable pork. Remove from heat and tent for 20 minutes before shredding.
2. Add smoke flavor without a smoker by stirring in a teaspoon or two of liquid smoke to the braising liquid, or use smoked paprika in the rub.
3. For a tangier profile, finish shredded pork with a splash of apple cider vinegar or a few tablespoons of your favorite BBQ sauce and warm through briefly.
4. If you prefer a crustier exterior, place the shredded pork under a broiler for 3–5 minutes after saucing to caramelize the top — watch closely to prevent burning.
Final Notes
This Dutch oven method is ideal for home cooks who want the flavor and tenderness of slow-cooked barbecue without specialized gear. It’s forgiving — you can comfortably leave it in the oven while you handle sides or entertain guests — and it consistently produces deep, savory results. If you don’t already own a heavy Dutch oven, consider one as a long-term kitchen investment: it’s versatile for braises, roasts, soups, and even baking.
Want to round out your kitchen? Check our guide to non-toxic cookware for safe finishes and materials that age well, especially if you’re adding enameled cast iron to your collection.
Ready to get started? Scroll down to the ingredient list and step-by-step instructions to cook along.