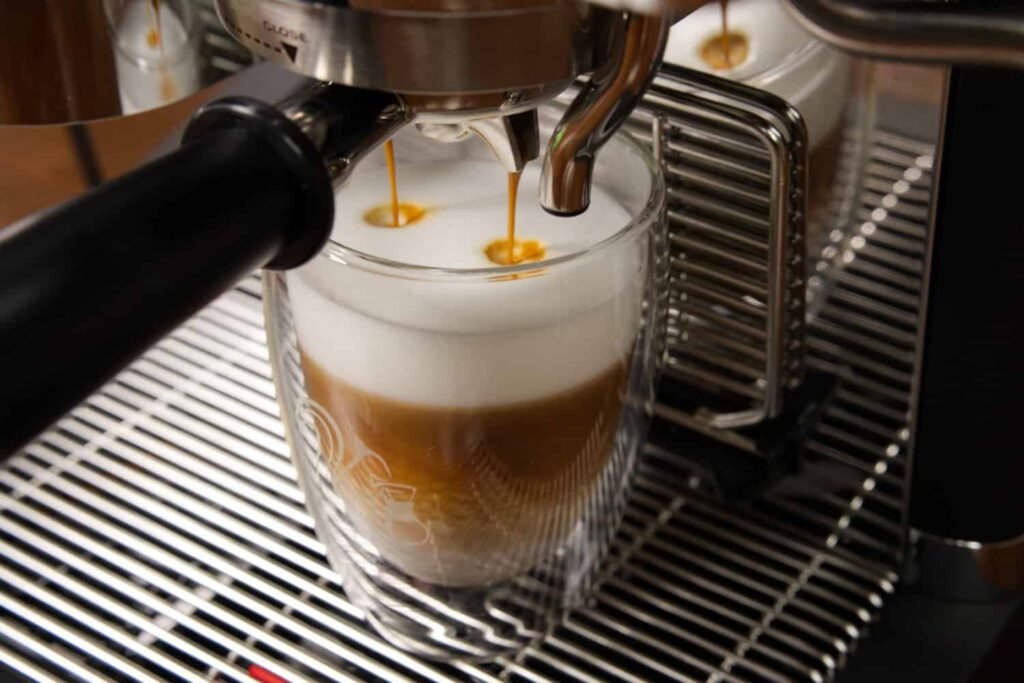
Espresso Machine Latte at Home

Learn how to pull a silky latte at home with your espresso machine — step-by-step guidance, equipment selection tips, and simple variations to customize your cup. Perfect for home baristas seeking café-quality results without leaving the kitchen.

10 min Prep Time
1 Servings
Medium Difficulty

Ingredients

Servings:
1
Nutrition (per serving)
Calories 150 kcal
Protein 8g
Fat 8g
Carbohydrates 12g
Fiber 0g
💾 Storage

A freshly made latte is best enjoyed immediately. If you must store, separate components: keep leftover espresso in an airtight container in the refrigerator and use within 24–48 hours (flavor will degrade). Store prepared milk (unfrothed) in a sealed container in the fridge for up to 48 hours. Reheat gently on the stove or with a steam wand to avoid scalding; avoid attempting to re-create microfoam from previously frothed milk.

🍳

Best Made With: Coffee Maker / Espresso Machine

Choose a pump-driven espresso machine with a steam wand and stable temperature control (PID) for the most consistent home lattes.

See Our Top Coffee Maker / Espresso Machine Picks →

Espresso Machine Latte at Home

There’s something special about a latte: the concentrated intensity of espresso married to creamy steamed milk yields a comforting, balanced drink you can enjoy any time of day. Making a latte at home with an espresso machine is both rewarding and economical — once you understand the fundamentals of extraction and milk texturing, the results are consistently delicious.

This recipe focuses on technique more than fancy tools. With a well-calibrated espresso machine, freshly ground coffee, and a little practice with your steam wand (or a quality milk frother), you’ll be able to recreate microfoam and latte art, or simply enjoy a perfectly textured milk-forward espresso drink. The approach below is flexible for whole milk, lower-fat milk, and popular plant-based alternatives.

Why this recipe works

This method emphasizes three pillars: dose and grind consistency, correct extraction time, and milk temperature/texture. Keeping those elements in balance produces a latte with sweet crema, neither bitter nor under-extracted coffee flavors, and a glossy, pourable microfoam that integrates smoothly with the espresso. It’s simple, repeatable, and adaptable to both single- and double-shot setups.

Choosing the right equipment

For home lattes, you don’t need a commercial machine, but a reliable espresso machine with a steam wand makes a big difference. Look for a machine that offers stable boiler pressure and a pump-driven group head for consistent shots. If your budget is smaller, a well-reviewed pump espresso machine or an automatic machine with a manual steam wand can be excellent choices.

Useful tools and product searches (affiliate links):

Two other helpful resources from HomeCookPicks:

What to expect

Expect an initial learning curve for tamping consistency and steam wand technique. After a few practice lattes you’ll be able to dial in grind and texture quickly. This recipe gives a baseline for a classic 8–10 oz latte (double shot espresso + milk). You can scale the proportions for smaller or larger drinks easily.

Tips & Variations

  • Use freshly roasted whole beans and grind just before brewing — freshness dramatically improves crema and aroma.
  • If you don’t have a steam wand, heat milk to about 140–150°F (60–65°C) and use an electric frother or handheld frother to create foam; then stir briskly to integrate microfoam before pouring.
  • For alternative milks, barista blends (oat or soy) produce better foam and sweeter flavor than straight almond or low-fat alternatives.
  • Practice pouring over a white cup to judge contrast and try simple latte art shapes — even a basic heart improves presentation and texture control.

Below you’ll find the ingredient list and step-by-step instructions to guide your home latte preparation. The instructions are formatted for a standard double-shot latte; adjust grind and dose if you prefer a single shot.

If you own an espresso machine, treat maintenance as part of the routine — backflushing and descaling per manufacturer guidelines will keep shots tasting their best. For descaling options, see the Best Descalers for Coffee Machines buying guide mentioned earlier.

Enjoy the process — making lattes at home is as much about ritual as it is about flavor. With a little practice you’ll have café-quality drinks on command.
Instructions

1

Preheat and prepare

Turn on your espresso machine and allow it to warm fully (typically 15–20 minutes). While it heats, purge the steam wand for a second to remove residual water and pre-warm your portafilter by locking it in and running a blank shot or by rinsing with hot water. Preheat your cup with hot water and empty before use.

💡 Pro tip: A fully warmed machine stabilizes temperature and improves shot consistency.
2

Dose and tamp the coffee

Weigh 18–20 g of coffee for a double shot and distribute evenly in the portafilter. Use a tamper to compress the grounds with consistent, even pressure (about 30 pounds of force) and polish the surface for a smooth puck.

💡 Pro tip: Even distribution and a level tamp prevent channeling and uneven extraction.
3

Pull the espresso shot

Lock the portafilter into the group head and start the extraction. Aim for a yield of 36–40 g of espresso in about 25–30 seconds (from pump start to stop) for a balanced double shot. Adjust grind finer for slower extraction or coarser for faster if needed.

💡 Pro tip: If the shot is pouring too fast, grind finer; if it’s too slow or syrupy, grind coarser.
4

Steam and texture the milk

Pour cold milk into a chilled stainless steel pitcher (fill to the bottom of the spout). Submerge the steam wand tip just below the surface and start steaming to create a whirlpool: introduce a little air for 1–2 seconds to create microfoam, then fully submerge the wand to heat to 140–150°F (60–65°C). Aim for glossy, velvety milk with tiny bubbles.

💡 Pro tip: Listen for a quiet, steady hissing — loud screeching often means the wand is too close to the surface or not angled correctly.
5

Polish the milk and settle

Tap the pitcher gently on the counter to pop large bubbles and swirl the milk to integrate foam into a silky texture. Hold the pitcher at a slight angle to keep a consistent pour and skim any large bubbles from the surface.

💡 Pro tip: Swirling breaks up larger bubbles and consolidates microfoam for a smooth finish.
6

Pour and finish

Start by pouring the espresso into a warmed cup if not already poured, then pour milk steadily into the center of the espresso, bringing the pitcher closer to the cup as the white foam appears. Move the pitcher slightly to create a pattern or finish with a simple heart or rosette if desired. Add syrup or garnish if using.

💡 Pro tip: Pouring speed and pitcher height control the design — higher for mixing, lower for creating art.

More to Cook

You Might Also Like

Dutch Oven Chicken and Dumplings

Comforting Dutch Oven Chicken and Dumplings — a one-pot dinner with tender braised chicken, silky gravy, and pillowy dumplings. Make this classic comfort food easily at home using a heavy Dutch oven for perfect heat retention.

View Recipe →

Homemade Layer Cake with Buttercream Frosting

A classic homemade layer cake with silky buttercream frosting—moist, tender layers and a smooth, spreadable frosting perfect for birthdays or weekend baking. This recipe uses simple pantry ingredients and a stand mixer to streamline the process.

View Recipe →

Chicken Fried Rice from Scratch

A simple, restaurant-style chicken fried rice you can make at home with everyday ingredients and either a stainless steel or nonstick pan; perfect for using day-old rice and cleaning out the fridge.

View Recipe →

Stay in the loop

Get the Best Kitchen Picks Delivered

New buying guides, honest reviews, and kitchen-tested recipes — straight to your inbox. No spam, ever.