Dutch Oven No-Knead Bread
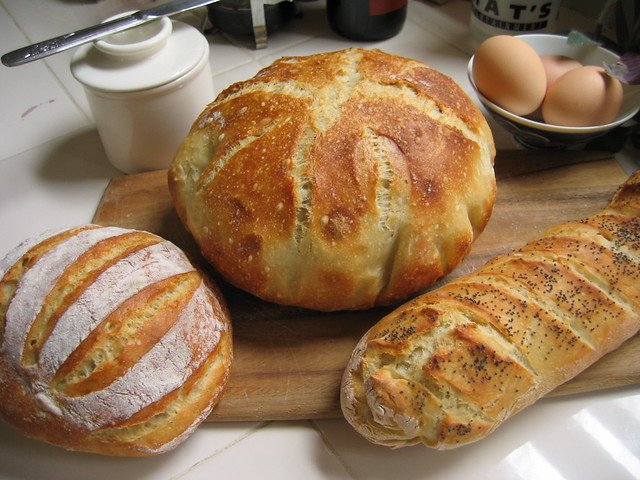
There are few things as satisfying as pulling a steaming, crackly loaf of bread from a Dutch oven and knowing you made it at home with minimal fuss. This Dutch Oven No-Knead Bread recipe relies on time and a cast-iron environment to develop flavor and structure, rather than elbow grease. The long, slow rise develops complex, slightly tangy flavors and a strong gluten network so the dough can hold its shape without kneading.
What makes this recipe special is its simplicity and reliability. A simple dough of flour, water, yeast, and salt becomes a rustic boule with a crisp, blistered crust thanks to the steam-trapping properties of a lidded Dutch oven. Because the pot creates a small, moist oven within your oven, the crust sets beautifully while the interior stays moist and open.
Why this method works
No-knead bread leverages time: an extended fermentation encourages gluten to form naturally and allows flavor molecules to develop. Short mixing followed by a long bulk rise (usually 12–18 hours) produces a dough that’s easy to shape and forgiving. Baking in a preheated Dutch oven traps steam, promoting oven spring and a glossy crust that you typically see from artisan loaves.
Choosing the right equipment
The single most important tool for this recipe is your Dutch oven. A heavy, lidded cast-iron or enameled Dutch oven holds heat evenly and traps steam, which creates the open crumb and crisp crust every baker wants. If you’re shopping, consider a 4–6 quart pot with a tight-fitting lid—large enough to allow the loaf to expand but not so large that it dissipates steam quickly. Browse our in-depth buying guide to find the right pot for your kitchen: Best Dutch Ovens for Sourdough.
If you don’t already own a good Dutch oven, a popular option many home bakers choose is to search for highly rated cast-iron pots on Amazon: Find Dutch ovens on Amazon. A bench scraper and a digital kitchen scale also make the process easier and more precise—search for them here: Bench scrapers & tools.
What you’ll learn
This article will walk you through the dough mixing, the long fermentation, shaping, and the final bake in a Dutch oven. It also covers equipment choices, troubleshooting for common problems, and a few variations so you can make the loaf your own. Whether you’re a first-time bread baker or want a reliable no-fuss method, this recipe is designed to produce consistent, delicious results.
Timing and expectations
Plan ahead: this recipe needs an extended rise—typically 12 to 18 hours—so start the dough in the evening for baking the next day. Active hands-on time is short, making this ideal for busy schedules. Expect a glossy, blistered crust and a tender, open crumb if you maintain hydration and fermentation times closely.
Tips and variations
- Use a kitchen scale for best results. Weights give consistent hydration and predictable dough behavior.
- For a nuttier flavor and more texture, substitute up to 25% of the all-purpose flour with whole wheat or bread flour; increase hydration by a tablespoon or two if needed.
- If you prefer a more sour flavor, ferment the dough longer at a cooler temperature or refrigerate the dough for 24–48 hours during the bulk rise for slow fermentation and complex flavor.
- Add-ins: fold in 1/2 to 1 cup of seeds, olives, roasted garlic, or herbs at the shaping stage for a flavored loaf.
Serving suggestions
This loaf is perfect warm with butter, as sandwich bread, or alongside soups and stews. Leftover slices toast beautifully and pair well with jams, cheeses, and salads. For storing leftovers, you may want to consult our guide to food storage options: Best Stainless Steel Food Storage Containers, which can help keep your bread fresher longer when cooled and sliced.
Why a Dutch oven beats other methods
While you can bake no-knead loaves on a baking stone with added steam, a Dutch oven is the most forgiving way to replicate bakery steam at home. The enclosed environment keeps moisture around the dough during the first portion of the bake, which maximizes oven spring and encourages a thin, crisp crust. For those who enjoy different shapes, consider reading about loaf pans too: Best Loaf Pans for Bread Baking, though this recipe is intended for freeform boules in a Dutch oven.
If you’re looking to buy recommended tools, here are two common searches that will help you start: cast iron Dutch oven and bench scraper and dough tools. These link to product searches to help you compare options quickly.
Ready to make your loaf? Scroll down to the ingredient list and step-by-step instructions. Remember: the magic here is time and heat—plan ahead, preheat well, and enjoy the process.